583
Love Moroccan food? Love bread? Then you’ll love this Moroccan khobz recipe! This easy bread recipe is perfect for anyone who wants to learn how to make Moroccan bread. It’s simple to follow and yields delicious results.
Whether you’re looking for a new dinner idea or something special to serve at your next party, you’ll be able to impress your friends and family with your new baking skills from Morocco!
Are you ready? I can’t wait to show you my mom’s Moroccan Khobz recipe!
You may also like to try:
Disclaimer: Please keep in mind that we may receive a commission when you click on our links and make a purchase. This, however, has no bearing on our reviews.
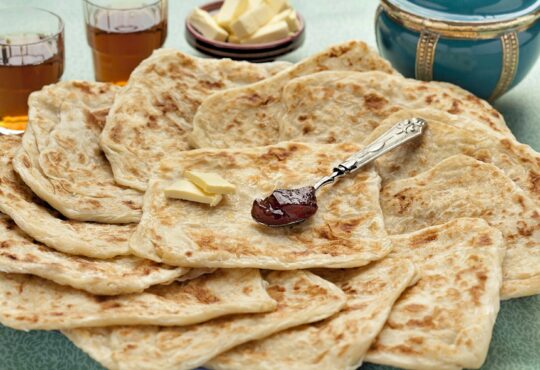
If you know Moroccans, then you know that we love our Khobz and we eat a lot of it. Moroccan Khobz is delicious round-shaped bread! It’s fluffy and soft on the inside with a crispy crust on the outside.
Moroccan fluffy rounds of bread
Khobz has different names in different regions. You may also hear us calling it Kesra or Agroum (in Amazigh regions).
In rural areas, Moroccan Khobz is usually baked in an ( Inoor ) Tandoor which is a cylindrical outdoor clay oven (women make it with their own bare hands).
Moroccan women baking bread in an outdoor clay oven
The clay oven would be heated with hot coals and the bread would be placed in a metal tray inside until baked.
Nowadays, most people prefer making their own bread at home using modern ovens and it tastes just as good!
For breakfast, Moroccan bread is best enjoyed freshly baked and dipped in honey, Argan oil, or olive oil.
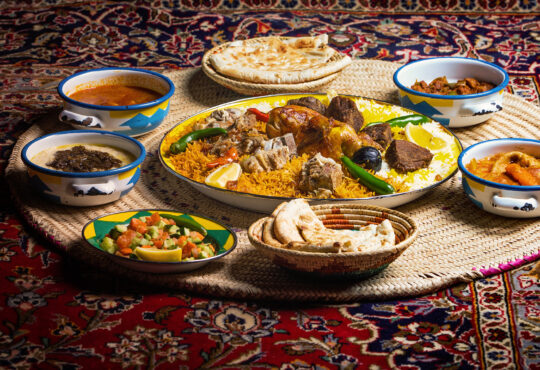
We also have Moroccan Khobz for lunch and dinner as an accompaniment to almost every dish including our mouthwatering tagines and soups. We even use it to scoop up any sauce or gravy that’s left over on our plates.
Moroccan khobz served with breakfast with black olives, olive oil, and Moroccan mint tea
Plus, Moroccan khobz can make a good sandwich by cutting wedges and stuffing it with your favorite fillings like stews, eggs, vegetables, and salads.
Moroccan bread is truly versatile and an essential part of our cuisine.
Moroccan khobz served with a Moroccan tagine
The good news is that everyone can make it at home because it’s so easy to make. You just need a few ingredients that you probably already have in your kitchen pantry.
Moroccan bread is unique in its texture and flavor. Unlike other types of bread, Moroccan bread is fluffy and soft on the inside with a crispy crust on the outside.
Classic flatbread
Moroccan bread is sometimes referred to as flatbread but I personally don’t think it’s accurate. While it is true that Moroccan bread is flat, it is not as thin as the regular flatbread.
Moroccan fluffy bread
Some people like to make their Moroccan bread very thin while others prefer it to be thick. But the common bread thickness is around 2 to 3 cm.
Moroccan khobz can be made with different types of flours. My mom’s Khobz recipe uses a mix of two different types of flours. Whole wheat flour and white flour (Called force in Morocco)
Organic whole wheat/grain bread flour
For the white (Force) flour, use a normal white baking flour. And for the whole wheat flour, any whole grain or barley flour will do.
If you can’t find whole wheat flour, don’t worry. You can use 100% all-purpose flour ( preferably the one labeled for bread).
Organic all-purpose white flour
The proportion for my Khobz recipe is 70% wheat flour and 30% white flour.
But the best thing to do is to use my mom’s recipe because it yields the best results of fluffy and crusty Khobz. I promise!
- 350 g whole wheat/grain flour
- 150 g white flour
- 2 tsp salt
- 2 tsp sugar
- 1 tbsp active yeast
- 2 tbsp olive oil or vegetable oil
- Approx 300 ml warm water (not hot)
- Semolina for sprinkling
- Step 1: In a large bowl, mix both flour types, salt, sugar, and mix well.
- Step 2: Form a hole in the center and pour the yeast with some warm water. Mix it until it dissolves then add the olive oil/vegetable oil.
- Step 3: Start pouring the rest of the water gradually while mixing all the ingredients with your other hand until it forms a homogeneous dough.
- Step 4: Knead the dough for about 15 minutes until it’s smooth and elastic. If the dough is too sticky, it means the flour did not absorb the water well, try adding a little more flour.
- Step 5: Cover the bowl with a plastic wrap and let it rise in a warm place for about an hour or until it doubles in size.
- Step 6: After an hour, the dough should have doubled in size. Now, sprinkle some Semolina/corn flour on your work surface (Pastry Mat or Board) and transfer the dough. Knead it for about 3 minutes to get rid of the air bubbles.
- Step 7: Divide the dough into two balls, cover it with a kitchen towel and leave to rest for 15 to 20 minutes.
- Step 8: After the dough balls have rested, shape them into a round flat loaf by patting gently with your hands and sprinkling a little bit of semolina/ corn flour.
- Step 9: Place the round loaves on a baking sheet lined with parchment paper and sprinkled with semolina. Garnish with sesame seeds (optional).
- Step 10: Use a fork to poke a few holes in the dough then place the baking sheet on the middle rack of a preheated oven at 350 F/180C. Bake for about 30 to 35 minutes.
- Once the bread is out of the oven, serve it hot or let it cool on a wire rack.
- You can store your bread for up to 3 months by freezing it
- You can use a stand mixer to knead the dough. Combine all the ingredients as described.
Did You Make This Recipe? How you went with my recipes? Tag me on Instagram at @CapeToCasa.
Like it? Share it!